
After MomoCon moved online, I had to record a video for my panel, The Joy of Game Development. Since this was a live coding demo, I needed to capture my screen and vocal narration. To make it feel more like a panel, I also captured my webcam.
I used five pieces of free software to accomplish this:
- OBS Studio (recording)
- Audacity (audio cleanup)
- Levelator (audio cleanup)
- DaVinci Resolve (video editing)
- Handbrake (video conversion)
Recording with OBS Studio
OBS Studio is versatile for recording and streaming. If you’ve streamed anything on Twitch, you’ve probably used it before. Most of the techniques you’d use for streaming would work here (and are probably out-of-scope for this blog post).
By default, OBS doesn’t record in MP4 format, but we’ll need that later in our process. You have two options:
- Go to File > Settings… > Output > Recording and set “Recording Format” to mp4. (This is a little riskier–because of the way MP4 files are written, if OBS Studio crashes, you’ll lose everything.)
- Leave “Recording Format” as mkv and run your video through Handbrake to convert it to MP4.
Once that’s done, you can set up your scene and click “Start Recording.” When you’re done you’ll get a video file in the selected folder (by default, the Video folder under your Windows user profile).
For simplicity’s sake, I just kept recording through outtakes. Using this workflow, it’s easier to cut out segments of video than it is to manage multiple files.
Sidebar: Deconstructing video in OBS Studio
If you want, you can lay out your video in OBS Studio. For example, you can set an image as your background, and then position your screen capture and webcam on top of it.
I decided to take my setup one step further. I arranged all of my components separately in OBS, so that I could crop and composite them in my video editing software:

Is the deconstructed approach worth it for most people? Probably not. I don’t do videos regularly, they usually only have a few components, and I usually do one long scene with outtakes cut out. The amount of time I spend cropping and compositing during video editing is pretty low. If I was doing more and varied videos, it would probably wear me out.
What’s the advantage? I’m not locked into the layout I chose in OBS. Let’s say I wanted to change the background I was using. I could easily replace that in video editing and re-render. The edit would be clean and I wouldn’t have to re-record anything.
To set this up in OBS Studio, I do the following:
- Create a new profile (Profile > New) and a new scene collection (Scene Collection > New). We’re going to change the canvas size to something non-standard, and I don’t want that breaking my configurations for streaming.
- Change the canvas resolution to be large enough to hold all of the components you want to record. Go to File > Settings… > Video and change both the “Base (Canvas) Resolution” and “Output (Scaled) Resolution.” I chose 3840×1080 since my output will be 1080p; the width is a nice even 2x.
- Create new scenes and lay out each component side-by-side. It’s helpful to use Scene Item Transform (right-click on a source > Transform > Edit Transform…) to see the actual values involved. We’ll come back to this when we get to our video editing software.
Audio cleanup with Audacity and Levelator
Once you finish recording or converting your MP4, you’re ready to begin audio editing in Audacity.
- Make sure you have FFmpeg for Audacity installed.
- Drag the MP4 file into Audacity. This will strip out the audio and display it as a new track.
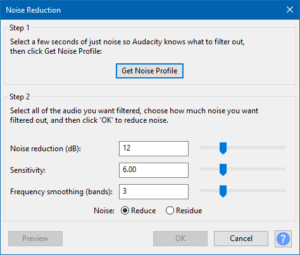
- Use Noise Reduction to remove background noise.
- Select a few seconds of “empty” audio–anything where there’s no speech or sound effects. Ideally, I like for my selection to contain some common noises (chair squeaking, air conditioning, etc.).
- Go to Effects > Noise Reduction… > Get Noise Profile to use this as the “sample.”
- Select the entire audio track.
- Go to Effects > Noise Reduction… > Get Noise Profile and click OK to clean up background noise.
- Export the file as a WAV. Go to File > Export as WAV. Levelator doesn’t support MP3s.
- Run the WAV file through Levelator. Drag the WAV file into Levelator. This will create a file with the same base file name, but the extension “.output.wav”. (You can run this back through Audacity if you’d rather than an MP3.)
Of course, if you want to get really fancy, you can use a more rigorous audio cleanup process than this–silencing um’s, etc. However, make sure you don’t cut any audio off the starting point, because you need to be able to line it up perfectly with the video in the next step.
Video editing with DaVinci Resolve
There is other reasonably-priced software you could use (Premiere Elements, Camtasia, etc.), but I like Resolve because it’s both powerful and free.
Like OBS Studio, a full tutorial on Resolve is outside the scope of a single blog post, but here’s the workflow I use:
- Import video and audio files into Media Pool (Workspace > Page > Media). This makes them available to be used in your project. If you change any of the files during editing, note that you’ll want to right-click on the clip and go to Relink Selected Clip… to make sure Resolve catches the update.
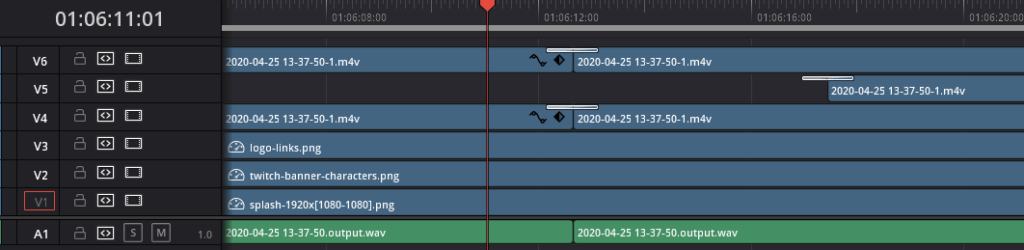
- Drag video and audio files to the timeline in Edit or Cut mode (Workspace > Page > Edit or Cut).
- Mute or delete the original audio in the video files. Deleting may be a bit trickier, since the video and audio starts out linked together. I remember this took some trial and error to figure out.
- Drag the cleaned audio file to a new Audio track in the timeline. Snap its starting point to the starting point of the associated video so that they line up.
- Link the cleaned audio to the video. Ctrl-click to select both, then right click > Link Clips. This will keep them together as you edit. You can also link more than one video and audio clip together.
- Edit the clips. You can use Trim Mode (T) to shrink them from the ends or Blade Mode (B) to split clips at the current position. Backspace will delete the selected clip(s) and leave them in position, while Delete will delete the selected clip(s) and close up any empty space on the timeline.
- Drag transitions from the Effects Library onto the timeline. Whenever you need to cut from one clip to another (e.g., if you’ve cut out an outtake), you can apply a transition between them to smooth out the cut. You can also apply transitions when a clip starts or ends for a fade in/out effect. In my video, I used “Cross Dissolve” for a subtle effect.
Sidebar: Reconstructing your OBS video
If you used the deconstructed video approach above, you can position each component by doing the following:
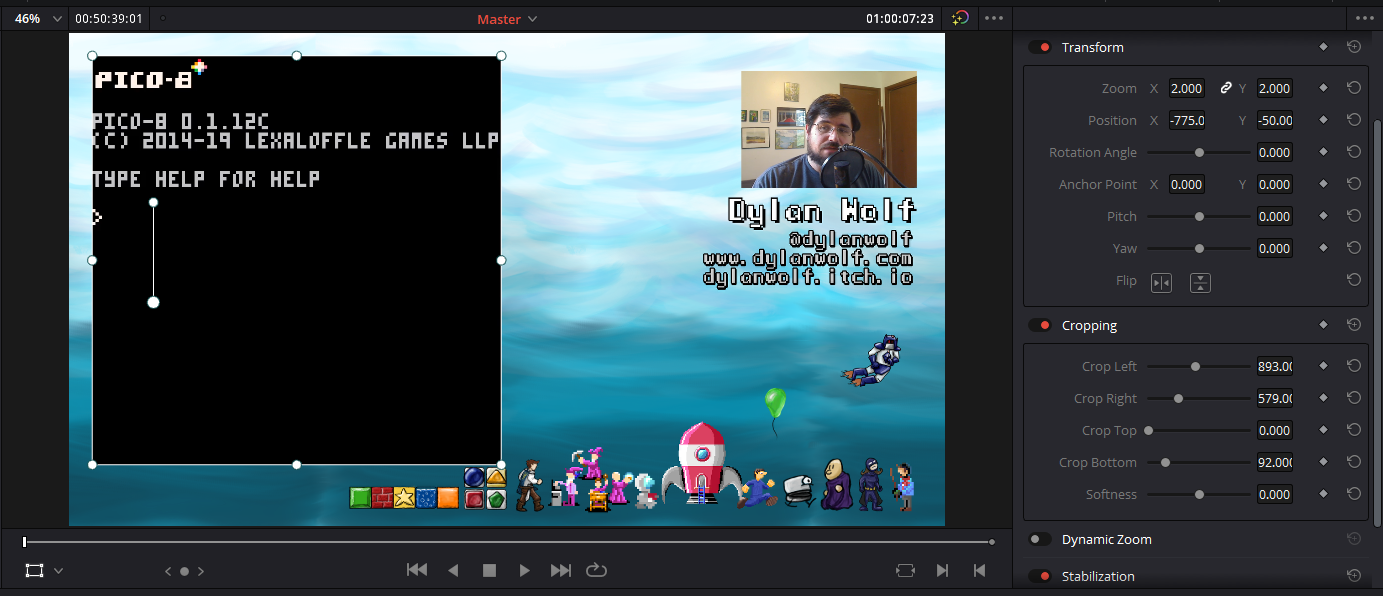
- Add a copy of the video clip to a new video track for each component you want to use. Put components that you want to show on top of other components higher in the timeline. To simplify later work, make sure to leave blank track(s) for your background image(s).
- Open the Inspector and edit Transform and Cropping to isolate the component. By default, Resolve will try to fit the entire video clip onto the canvas. At 3840×1080 (twice as wide as 1080p), you’ll need to adjust the Zoom to 2, and you can set Cropping values based on the OBS Studio Scene Item Transform window values we discussed above:
- Crop Left = OBS Position X / 2
- Crop Right = (3840 – OBS Position X – OBS Size X) / 2
- Crop Top = OBS Position Y / 2
- Crop Bottom = (1080 – OBS Position Y – OBS Size Y) / 2
- Drag each component on the canvas to position it.
Export to MP4
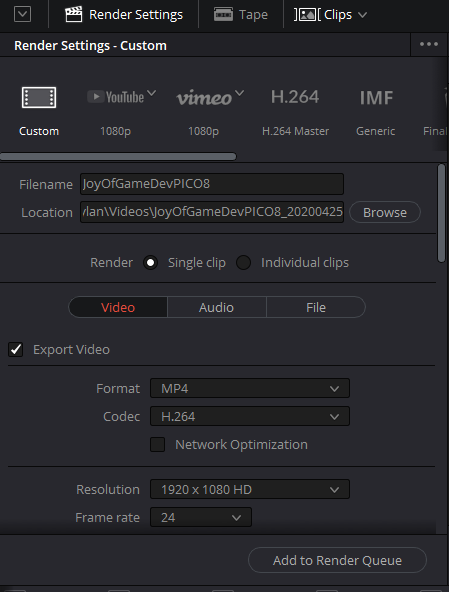
When you’re done, you can go to Workspace > Page > Deliver to export your timeline to an MP4. I usually use Custom, enter a filename and location, and change Format to MP4. Then, click “Add to Render Queue” and “Start Render”.