
Dr. Mario (source: Wikipedia)
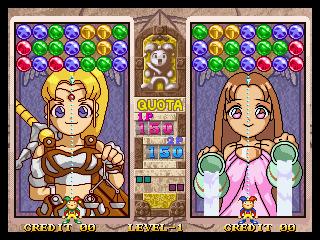
This year in SeishunCon‘s digital gaming room, I was reintroduced to the match-3 game. I’d played Dr. Mario when I was younger, but more competitive games like Magical Drop, Bust-A-Move, and Tokimeki Memorial Taisen Puzzle-Dama were something very different.
Ultimately, I realized just how many more-or-less neutral decisions are involved in making a match-3 game.
During this year’s Ludum Dare, I decided to jump in head-first. I did a bit of a warm-up the week before, trying to build a Tetris-style algorithm that detected and cleared out lines. This tutorial from Unity Plus was a huge help. Of course, the Tetris matching algorithm–a complete row of tiles–is much simpler than an algorithm that picks out irregularly shaped patches of matching tiles.
If you want to see all of these code samples in context, check out my Ludum Dare 30 repo.
Two worlds
Magical Drop 3 (source: Kazuya_UK)
The trickiest part of building a puzzle game in Unity is that the game itself doesn’t live in world space. Not fully, anyway.
This isn’t as true in other genres. Platformers, for example, live almost exclusively in the Unity game world. The player’s Transform tells you its location. Colliders (or, in some cases, raycasts) tell you when the player is on the ground, hitting the ceiling, or colliding with an enemy. Even if you aren’t using in-game physics, you’re probably adding force or setting velocity on a Rigidbody so that you get collision detection for free.
Not so with a puzzle game. If your game involves clicking, you might get some coordinates in world space, but you’re probably going to convert that to a cell in a grid that lives entirely in code. There’s a good reason for that–it’s far easier to write the logic for scoring a game like Tetris or Dr. Mario when you’re thinking about blocks or tiles, not individual pixels.
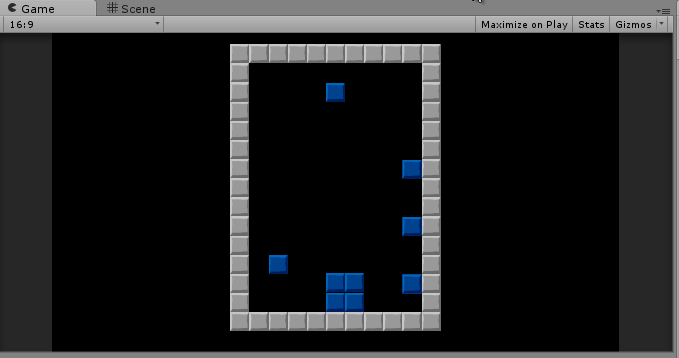
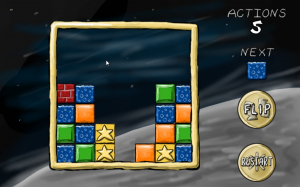
I’m pretty sure Tetris blocks are not supposed to stick to the side of the board.
My warm-up actually tried to live in world space as much as possible. It used physics to determine when a tile had landed, and only transferred data back to a two-dimensional array to detect row completion. That seemed safer–what happens in the game world is real, after all. It’s what the player sees, so if you store your data there, there’s no fear of getting out of sync, right?
I was wrong. No matter how I tweaked it, it never did work right.
The Unity Plus tutorial I linked above was a huge help. If nothing else, it allowed me to trust that moving my logic fully out of the game world and into an abstract data structure was a valid approach. If you haven’t already, go back and at least skim it, because I intend this post to be an extension from Tetris logic into match-3 logic.
Converting from board to world space
Once I figured out this transition was manageable, this part was easy. I created a GameTile class that tracked the color, row, and column of the tile, and updated the tile’s position based on that. Here’s an abridged version:
public class GameTile : MonoBehaviour {

 private Transform _t;
 private SpriteRenderer _s;

 [System.NonSerialized]
 public int TileColor;

 [System.NonSerialized]
 public int Row;

 [System.NonSerialized]
 public int Column;

 void Awake () {
   _t = GetComponent<Transform>();
   _s = GetComponent<SpriteRenderer>();
 }

 Vector3 tmpPos;
 public void UpdatePosition()
 {
   tmpPos = _t.position;
   tmpPos.x = (Column * Board.TileSize) - Board.WorldOffset;
   tmpPos.y = (Row * Board.TileSize) - Board.WorldOffset;
   _t.position = tmpPos;

   _s.sprite = Board.Current.Textures[TileColor];
 }

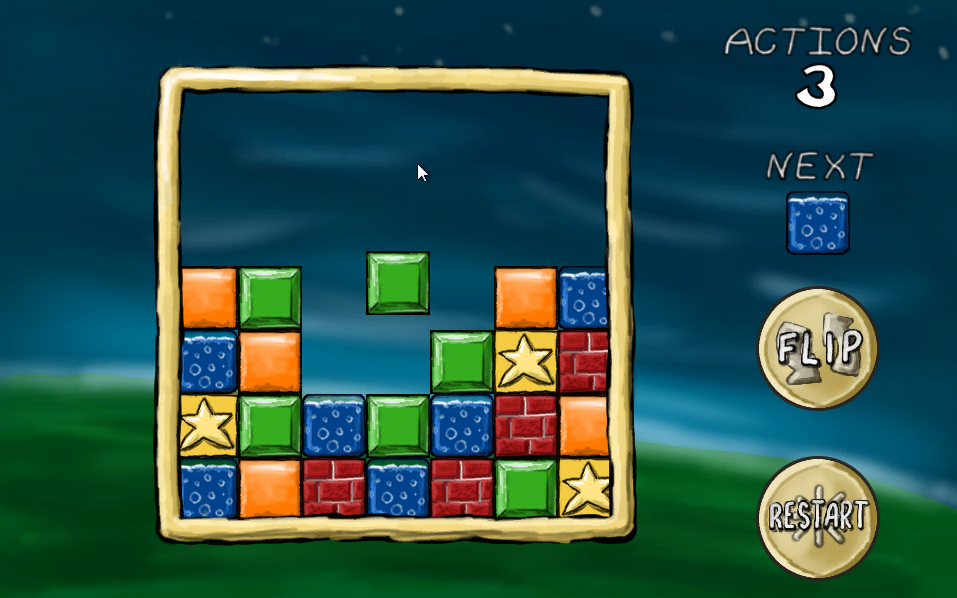
Tiles in a grid
Note that, in this case, TileSize is a constant that represents the size of a tile in Unity units. I’m using 64×64 pixel tiles, and the sprite size in unity is 100 pixels per unit, so TileSize works out to 0.64. I’m also using a constant offset so that the middle of the 7×7 board is at 0,0 world space, and the lower-left corner is tile 0, 0 in game space.
I also created an array that represents the gameboard as a static field in a class called Board. (Board started off as a static class and became a singleton because I needed to set some values in-editor, so it’s clumsily straddling the worlds of game object and static class.)
 public const float TileSize = 0.64f;
 public const float WorldOffset = 1.92f;

 public const int BoardSize = 7;
 public static GameTile[,] Tiles = new GameTile[BoardSize, BoardSize];
While the Unity Plus tutorial used a two-dimensional array of integers, I decided to store references to my GameTile objects in this array. This allowed me to pass data to and from tiles directly and (as we’ll see later) made tile-clearing and animation generally easier.
Whenever I made a change to board state, it meant that I could simply loop through the board array and tell each tile where it was supposed to be:
 public static void UpdateIndexes(bool updatePositions)
 {
   for (int y = 0; y < BoardSize; y++)
   {
     for (int x = 0; x < BoardSize; x++)
     {
       if (Tiles[x,y] != null)
       {
         Tiles[x, y].Row = y;
         Tiles[x, y].Column = x;
         if (updatePositions)
           Tiles[x, y].UpdatePosition();
       }
     }
   }
 }
Note that in every case, we’re always converting from abstract game space into world space. Unity game objects aren’t storing the important game state information directly; they’re always a representation of that state.
… and back again
In my game, there was one case where I needed to convert from world to game space, and that’s when the user clicked an empty space to drop a tile. To do this, I simply created a large collider behind the entire gameboard with this script attached:
 void OnMouseDown()
 {
   if (GameState.Mode == GameState.GameMode.Playing)
   {
     mouseClick = Camera.main.ScreenToWorldPoint(Input.mousePosition);
     mouseX = (int)Mathf.Round ((mouseClick.x + WorldOffset) / TileSize);
     mouseY = (int)Mathf.Round ((mouseClick.y + WorldOffset) / TileSize);
     PutNextTile(mouseX, mouseY);
     Soundboard.PlayDrop();
     GameState.ActionsTaken++;
   }
 }
That’s really all there is to it. Note that it’s basically the reverse of UpdatePosition() above, which converts from game to world space.
Detecting and clearing matches
Clearing matches
This is the trickiest part. Actually, this is probably why you’re reading this blog post.
Horizontal matching (as in Tetris) is pretty easy–you just need to look for contiguous tiles in the same row. Even allowing horizontal or vertical matches (as in Dr. Mario) is just a variation on this theme. However, trying to track a set of contiguous tiles that can vary horizontally and vertically is going to take some recursion.
Each time we take an action that changes the board, we’ll trigger a check. The first thing we do is copy our entire board array into another array:
 static void CopyBoard(GameTile[,] source, GameTile[,] destination)
 {
   for (int y = 0; y < BoardSize; y++)
   {
     for (int x = 0; x < BoardSize; x++)
     {
       destination[x, y] = source[x, y];
     }
   }
 }

 static bool clearedTiles = false;
 public static void MatchAndClear(GameTile[,] board)
 {
   clearedTiles = false;
   // Make a copy of the board to test
   CopyBoard(board, toTest);

//... continued...
Why? We’ll see later that it makes it much easier to tell which tiles we’ve checked.
We start the process with a brute-force approach. We’ll go cell-by-cell (first rows, then columns), testing each cell. For each test, we’ll reset some variables we use to track our testing, and then call a separate function (which we’ll later use for recursion):
// Continued from MatchAndClear() above...

   currentTile = null;
   collector.Clear ();

   for (int y = 0; y < BoardSize; y++)
   {
     for (int x = 0; x < BoardSize; x++)
     {
        TestTile (x, y);

// Continued later...
Let’s take a look at that TestTile function:
 static void TestTile(int x, int y)
 {
   // Tile already tested; skip
   if (toTest[x,y] == null)
   {
     return;
   }
   // Start testing a block
   if (currentTile == null)
   {
     currentTile = toTest[x, y];
     toTest[x, y] = null;
     collector.Add(currentTile);
   }

// ** Skipped lines--we'll come back to these later **

 // If we're processing this tile, test all tiles around it
   if (x > 0)
     TestTile(x - 1, y);
   if (y > 0)
     TestTile(x, y - 1);
   if (x < Board.BoardSize - 1)
     TestTile(x + 1, y);
   if (y < Board.BoardSize - 1)
     TestTile(x, y + 1);
 }
If this function finds that the cell is null, then we skip it. A null cell means that it’s either empty, or we’ve already tested it. (That’s why we copied it into a separate array–we can manipulate the new array at will.).
If the cell has a value, though, we’ll do a few things. First, we’ll remember it as our “current” cell–the one at the top of the chain of recursion. Then, we’ll remove it from our copy of the gameboard so that we don’t test it twice. We’ll also add it to a List so we can remember how many contiguous tiles of the same color we’ve found.
There’s two other conditions we might run into later in the recursion, but we’ll talk about them later. Once we’ve tested a cell, we’ll then grab the four cells around them an run them through the same test.
The “current” cell is now set, indicating this isn’t our first level of recursion. On these function calls, we now have three possibilities for each cell.
First, the cell could be null, which again means we’ve already tested it or it’s empty. Again, we’ll do nothing if that’s the case.
Second, the cell could not match the “current” cell. In that case, we don’t consider it “tested.” Our recursion tests for a single set of contiguous tiles of a single color. Just because this tile isn’t part of the current set doesn’t mean it’s not part of a different one.
// From TestTile() above...

 // Tile doesn't match; skip
 else if (currentTile.TileColor != toTest[x, y].TileColor)
 {
   return;
 }
Third, the cell could be the same color as our “current” cell. If that’s the case, it’s been “tested,” so we’ll set it to null in our copy of the board. We’ll also add it to that List we use as an accumulator. This is one of the conditions we skipped in the example above:
// From TestTile() above...

 // Tile matches
 else
 {
   collector.Add(toTest[x, y]);
   toTest[x, y] = null;
 }
The function will continue recursing until it’s exhausted all options, either by hitting an empty cell or the edge of the board. At that point, we return to the main “brute force” loop to handle our results.
If our accumulator has more than three tiles, then this was a successful match. If not, then we’ve tested one or two tiles, but we don’t need to take action:
// Continued from MatchAndClear() above...

       if (collector.Count >= 3)
       {
         foreach (GameTile tile in collector)
         {
           ClearTile(tile.Column, tile.Row);
           clearedTiles = true;
           Soundboard.PlayClear();
         }
       }
       currentTile = null;
       collector.Clear ();
     }
   }

   if (clearedTiles)
   {
     SettleBlocks(board)
   }
 }
Here, as we’ll discuss later, I’m simply triggering some animations. The simplest approach, though, is to loop through our accumulator and call DestroyObject on each matching tile’s game object. That kills two birds with one stone: the in-game objects are gone, and the cells in our board state are set to null.
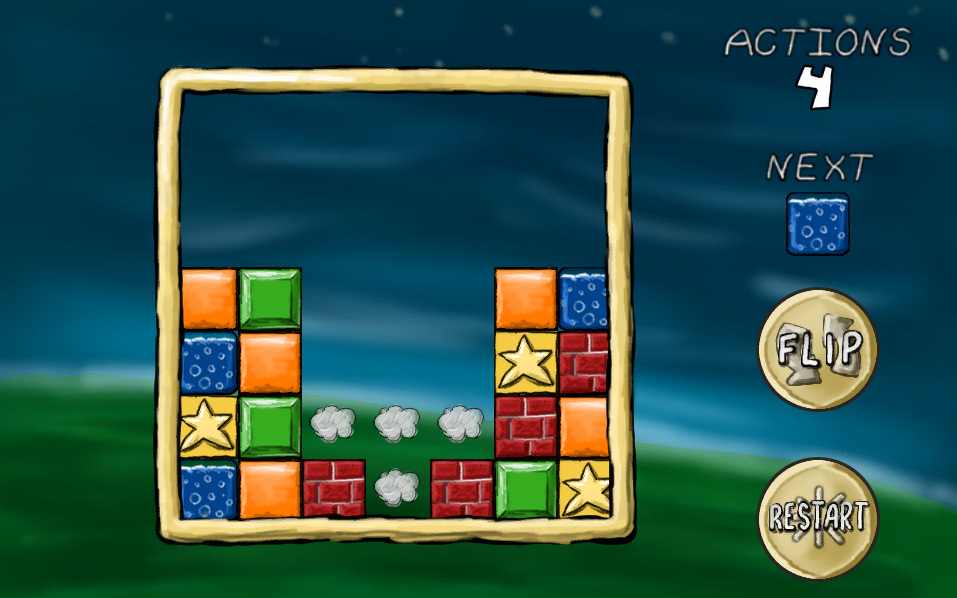
Dropping tiles

Dropping a tile
Certain changes–dropping a tile or clearing tiles, in this case–can leave unsupported tiles which must be resolved (if those are the rules of our puzzle game, of course). This is actually a really simple algorithm.
We’ll go column-by-column this time, then row-by-row. The order is important here.
In each column, we’ll work our way up from the bottom until we find an empty cell. Then, we’ll make a note of that cell. The next time we find a tile, we’ll simply shift it down to that location and add one to our “empty cell” index:
 static int? firstEmpty;
 public static void SettleBlocks(GameTile[,] board)
 {
   for (int x = 0; x < BoardSize; x++)
   {
     firstEmpty = null;
     for (int y = 0; y < BoardSize; y++)
     {
       if (board[x, y] == null && !firstEmpty.HasValue)
       {
         firstEmpty = y;
       }
       else if (firstEmpty.HasValue && board[x, y] != null)
       {
         board[x, firstEmpty.Value] = board[x, y];
         board[x, y] = null;
         firstEmpty++;
       }
     }
   }
   UpdateIndexes(false);
 }
When you’re done, don’t forget to call your matching function again. It’s entirely likely that dropping tiles has created some empty rows.
In fact, if we were scoring points, this would make it easy to award combo bonuses or multipliers. All of these repetitions of dropping and clearing blocks are just recursions of that first call that was triggered by a player action. We could tell both how many total matches resulted from a player action, and how many levels of “chaining” were required for each action.
Animations
This is a working game, but it’s not intuitive, primarily because we have no animations. Tiles disappear, then reappear on lower rows. It’s hard to figure out what’s really going on unless you’re watching closely.
This is tricky to do. Game objects are always a representation of game state, so our tiles are always laid out on a grid. Tiles are always in one space or another; so a tile might be in row 1 or row 2, but it’s never in row 1.5.
What’s the trick? We should never be manipulating the game board and animating at the same time. Think about how Tetris or Dr. Mario work–you don’t drop the next tile until everything has had a chance to settle. This gives a brief reprieve for the player, but it also ensure we don’t have any weird race conditions or interactions.
As an aside, I recommend creating a “game state” enumeration whenever you start a new project. I’ve never written a game where I didn’t need to know whether the game was in play, paused, showing a menu, in dialogue… I could go on. Best to plan for it early–that way you can ensure that every line of code you write tests that it should be running in this state.
Admittedly, my implementation is kludgy, but here’s the basic idea–when we clear or drop a tile, we trigger a state change. Each GameTile object knows how to handle this state change, and (more importantly) it knows when to tell the gameboard that it’s finished with its animation:
 void Update () {
   if (GameState.Mode == GameState.GameMode.Falling && Row != LastRow)
   {
     targetY = (Row * Board.TileSize) - Board.WorldOffset;

     tmpPos = _t.position;
     tmpPos.y -= FallSpeed * Time.deltaTime;
     if (tmpPos.y <= targetY)
     {
       Board.fallingBlocks.Remove(this);
       UpdatePosition();
       Soundboard.PlayDrop();
     }
   }
 }
When a clear animation finishes, the game needs to check if it should be dropping tiles:
 private static float timer;
 private const float DisappearTimer = 0.667f;
 void Update()
 {
   if (GameState.Mode == GameState.GameMode.Disappearing)
   {
     timer -= Time.deltaTime;
     if (timer <= 0)
     {
       GameState.Mode = GameState.GameMode.Playing;
       SettleBlocks(Tiles);
     }
   }
When the drop animation finishes, it needs to check for matches:
   if (GameState.Mode == GameState.GameMode.Falling && fallingBlocks.Count == 0)
   {
     GameState.Mode = GameState.GameMode.Playing;
     MatchAndClear(Tiles);
   }
 }
This cycle repeats until we finally don’t have any more matches, and then the game can go back to doing its thing.


